
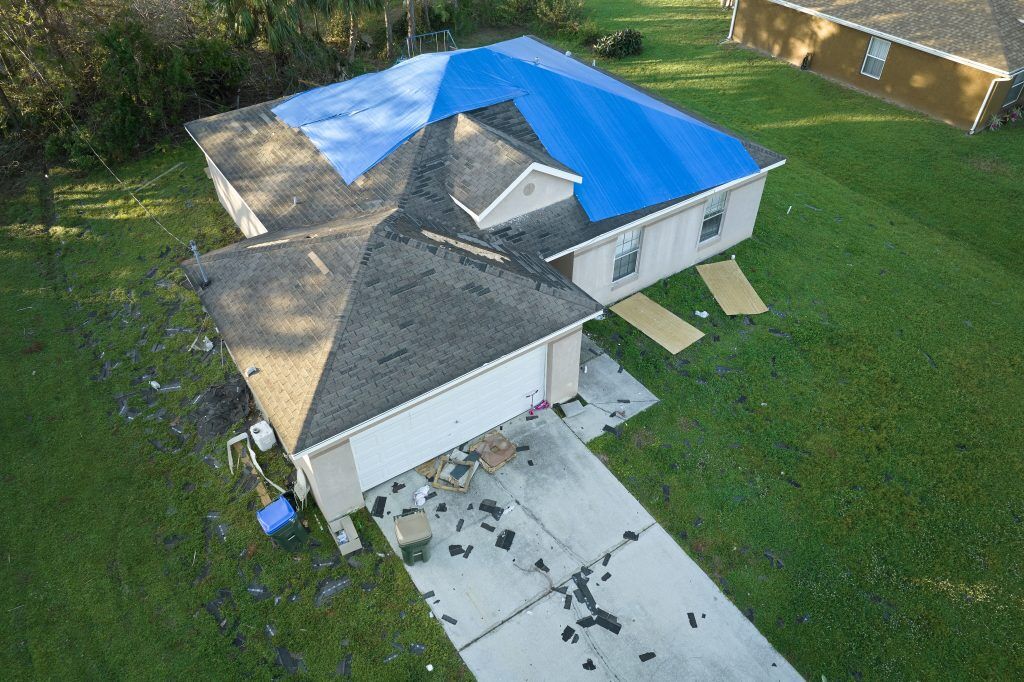
A roof leak during a storm doesn’t wait for a roofer’s schedule, so knowing how to temporarily patch a roof can keep water away from your ceiling, insulation, and belongings for a short time. Any patch you make at home is short-term, and the roof will still need a proper roof repair with new shingles or flashing. Here’s how mid-Missouri homeowners can slow a leak safely, which materials work for which problems, and when it makes more sense to leave the job to a professional.
Start Inside and Stay Off a Wet Roof
The first step happens in the attic or the room below the leak. Put a bucket under the drip, move furniture and electronics out of the way, and cover anything you can’t move with plastic sheeting. That interior protection is enough for now if the weather is still bad.
Don’t climb onto the roof during a storm, in high wind, or while the surface is wet. Wet shingles are slippery, and a badly damaged section may not hold your weight. Once conditions clear, set up an extension ladder using the 4-to-1 rule, which places the base one foot out from the wall for every four feet of height.
The ladder should extend at least 3 feet above the roof edge, so you have something to hold when stepping on and off. OSHA uses both standards for roof access. Keep three points of contact while climbing, watch for power lines, and have a second person on the ground. Once you’re up, stay off the damaged area itself.
How to Temporarily Patch a Roof With Roofing Cement
Roofing cement, also sold as flashing cement or plastic roof cement, is the standard material for small temporary fixes. It’s a thick, asphalt-based compound that comes in cans or caulk-gun tubes, and some products are labeled “wet/dry” or “all weather” for use on damp surfaces. It handles a few common problems.
A cracked shingle can be sealed by spreading a layer of cement over the crack with a putty knife, working it slightly past the edges of the damage.
Loose shingle tabs can be reattached by placing a spot of cement under the center of each loose tab and pressing the tab down firmly so it bonds to the shingle beneath it.
Gaps along flashing around a chimney, vent pipe, or wall can be resealed by running a bead of cement along the joint with a caulk gun.
For an opening left by a missing shingle, roofing tape or a piece of roofing felt sealed down with roofing cement can cover the spot until a replacement goes in. Our guide on how to replace missing shingles explains what the permanent fix involves. Roofing cement has a much shorter useful life than the shingles or flashing a roofer installs, so treat any of these fixes as a stopgap.
Covering Larger Damage With a Tarp
When the damage is bigger than a few shingles, such as a hole from a fallen limb or a section stripped off by wind, a tarp gives broader coverage. Measure the damaged area from a safe spot and buy a tarp large enough to cover it and extend over the ridge, about 4 feet down the other side. Running the tarp over the peak of the roof keeps water flowing across its surface instead of underneath it.
Clear loose debris first. Then wrap the top edge of the tarp around a 2×4 board, attach it, and screw the board through the tarp, shingles, and into the roof decking. Add more 2x4s along the sides and bottom so wind can’t catch the edges. Our step-by-step walkthrough on how to tarp a roof covers sizing and fastening in more detail.
Tarping a steep roof or a two-story home is a different situation. Professional crews working at that height use fall protection, and most homeowners don’t have that equipment.
How Long Will a Temporary Patch Hold?
Most tarping guidance treats about three months as the outside limit, and the goal is to have the roof repaired and the tarp removed well before then. Roofing cement wears out faster than permanent roofing materials, so a cement patch should be treated the same way.
Timing matters in mid-Missouri because a patch often has to sit through more than one storm. The National Weather Service office in St. Louis regularly issues warnings for large hail and damaging wind gusts across the region, and every round of severe weather puts more stress on a tarp or a sealed crack. Check the attic after each heavy rain to confirm the patch is still keeping water out, and schedule the permanent repair as soon as you can.
Document the Damage Before You Patch
If a storm caused the damage, take photos before you touch anything. Photograph the roof from the ground, the damaged area up close if you can reach it safely, any debris, and water stains inside the house. Then take another set once the patch is in place, and keep receipts for the tarp, cement, and other supplies. Pictures of the original damage help when you file a claim.
We’ll walk you through the roof insurance claims process, and storm damage restoration is one of the main things our crews do, from the first inspection to the finished roof.
When to Call a Roofer Instead
Knowing how to temporarily patch a roof is useful, but skip the DIY route if the roof is steep, the house has two or more stories, the damage covers a large area, or you aren’t comfortable on a ladder. That’s where Resolve Roofing comes in. Our emergency roof repair service has an $800 minimum for repairs, and tarping is free when we’re also doing the repair work. We’ll get out for a free inspection within 24 hours and explain whether a repair will do or the damage calls for more.
We’re family-owned and operated. We’re an Owens Corning Preferred Contractor, a Malarkey Emerald Pro contractor, GAF certified, and a RainDrop Pro certified gutter guard installer. For larger repairs, financing through ServiceFinance includes 0% interest with no payments for 12 months, 18-month and 24-month plans, and a 120-month option at 9.99%. Military members and first responders receive a 5% discount.
If a leak has you watching the ceiling every time it rains, call Resolve Roofing to schedule a free inspection, and we’ll have someone at your home within 24 hours.